
 Pin
Pin
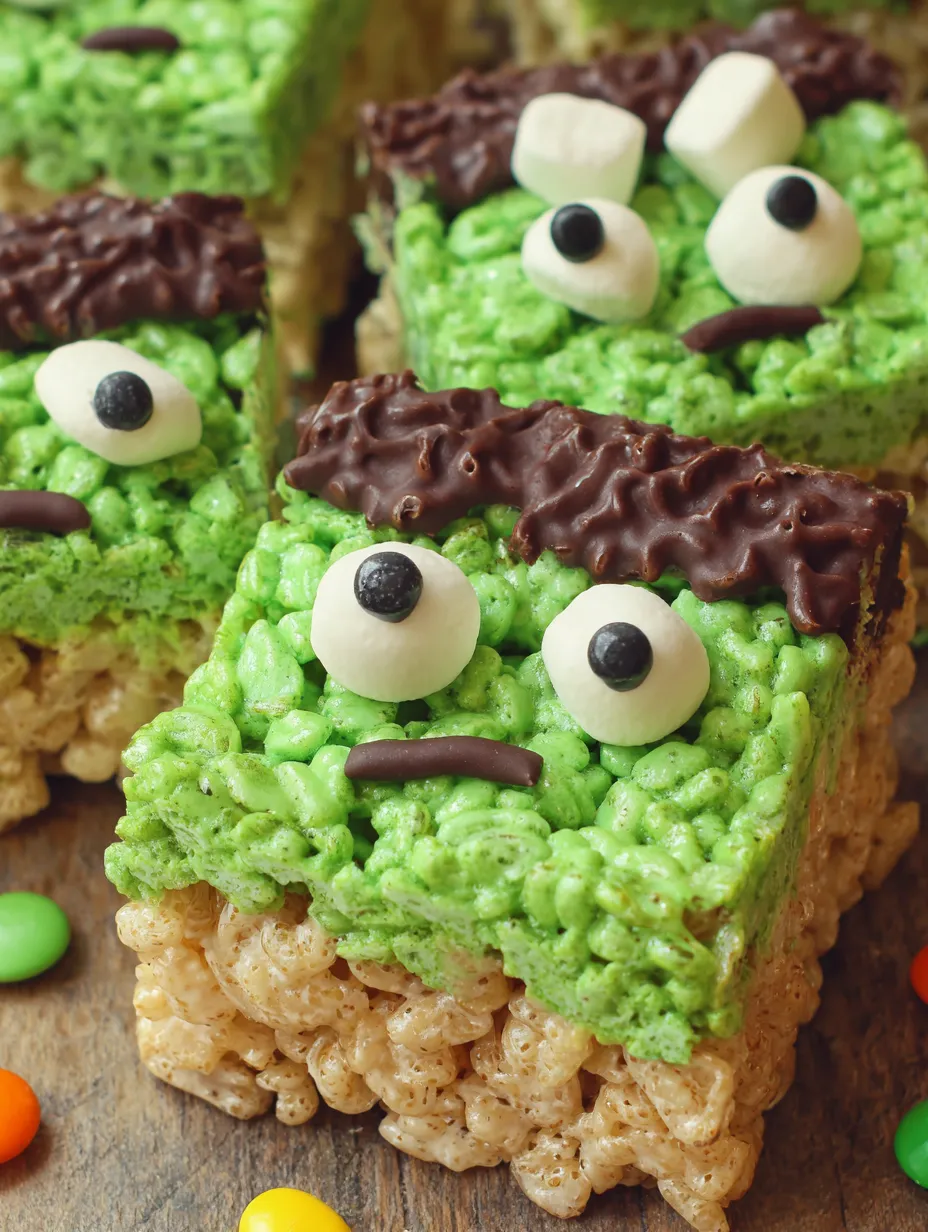
These Frankenstein Rice Krispies Treats totally steal the show at Halloween parties. They're simple enough that they're my go-to evening snack for kids. The mix of crunchy rice, gooey marshmallows, and wild decorations makes them perfect when lots of little hands are digging in.
I first whipped up these green monsters a couple years ago for a last-minute Halloween craft session with some neighbor kids. Now they ask for them every October, and we’re all grinning the whole time.
Tasty Ingredients
- Mini Marshmallows: Make your squares super soft. Fresh ones work best, otherwise they can get chewy.
- Butter: Adds flavor and keeps things together. Real butter is best.
- Green Food Coloring: Monster vibes. Just a few drops and you've got that color popping.
- Vanilla Extract: Adds a deep, sweet flavor. Real extract is better than imitation.
- Salt: Cuts the sweetness a little. Just a small pinch does the job.
- Rice Krispies: Your crispy crunchy foundation. Make sure they’re fresh!
- Chocolate Candy Coating or Almond Bark: Melt it for perfect monster hair. Good chocolate melts easy and gives a strong shell.
- Sugar Eyes: Give Frankenstein his look. You’ll find these in the baking aisle.
- Black Cookie Icing: For mouth and stitches. It stays nice and bold once dry.
Simple How-To
- Decorate the faces:
- Use the black icing to stick on sugar eyes and draw a mouth plus some stitches. Pop a mini marshmallow on each side for bolts.
- Dunk in chocolate:
- Dip the top end of each bar about 2 centimeters into your melted chocolate. Let the extra chocolate drip off, then put them on baking paper to cool.
- Cut and set up:
- Once the mixture’s cool, slice it into nine equal squares. Best to put them on baking paper for decorating later.
- Press into the pan:
- Push the green gooey mix into your lined baking pan and smooth the top. Let it firm up for an hour on the counter.
- Add the Rice Krispies:
- Toss in the cereal, then fold it all together with a silicone spatula until it’s coated.
- Add color and flavor:
- Stir in a splash of vanilla, a pinch of salt, and a few drops of green color. Mix until the shade’s even all over.
- Melt the chocolate:
- Chop up your chocolate and microwave in short bursts, stirring until glossy and smooth.
- Get your pan ready:
- Spritz a 23x23 cm pan with nonstick spray so the treats pop out easily.
- Melt butter and marshmallows:
- Throw cubed butter and most of your marshmallows in a big microwave bowl. Warm for a minute and a half. Stir until it’s creamy and melted together.
 Pin
Pin
Things to know
With just a handful of stuff, you’ll have a crowd-pleaser. Each bar comes out different and lets everyone get creative. They’re good for a couple days after decorating. My favorite bit? Stickin’ on the eyes. No two monsters ever look the same. We used to vote for the weirdest faces my kids created and always ended up in stitches from laughing so hard.
 Pin
Pin
Storage advice
Once decorated, these Frankenstein treats last up to four days in an airtight box. If you layer them with baking paper, they don’t stick together. No need to chill them, but if it’s super warm, chocolate can get melty.
Swapping ingredients
Try spelt crispies or gluten-free flakes if you want. Not into almond coating? Dark chocolate works fine. Use Smarties or little marshmallow bits if you can’t find candy eyes.
How to serve your monsters
Lay them out on bright paper or on a rustic wood board—they’ll look extra spooky! Wanna go all out for Halloween? Add some licorice spiders or colored sprinkles. They’re also perfect for gifting if you bag them up in cellophane.
A bit of history
Rice Krispies squares started as fun school snacks over in the US. This Frankenstein spin happened as a sweet Halloween project and it’s become our family’s yearly must-make. That quirky look mixed with classic flavors pulls in everyone.
Common Recipe Questions
- → How do you turn the snacks green?
You just add some food coloring into the melted marshmallows and butter before mixing in the rice cereal.
- → How do you keep the chocolate coating smooth and firm?
Let the dipped treats air-dry on parchment paper—that way the chocolate gets shiny and sets nicely.
- → Can I swap the candy eyes for something else?
Sure thing, you can use chocolate pearls or colored icing instead of candy eyes if you want.
- → Can you prep these ahead of time?
Yep, they’re good to make a day or two in advance—just store them in an airtight container.
- → What can I use if I don't have chocolate bark?
If you’re out of chocolate bark, use regular baking chocolate or a chocolate bar for the topping.
- → Are these snacks okay for kids?
Definitely! With their simple steps and goofy look, these are perfect for a children's party.