
 Pin
Pin
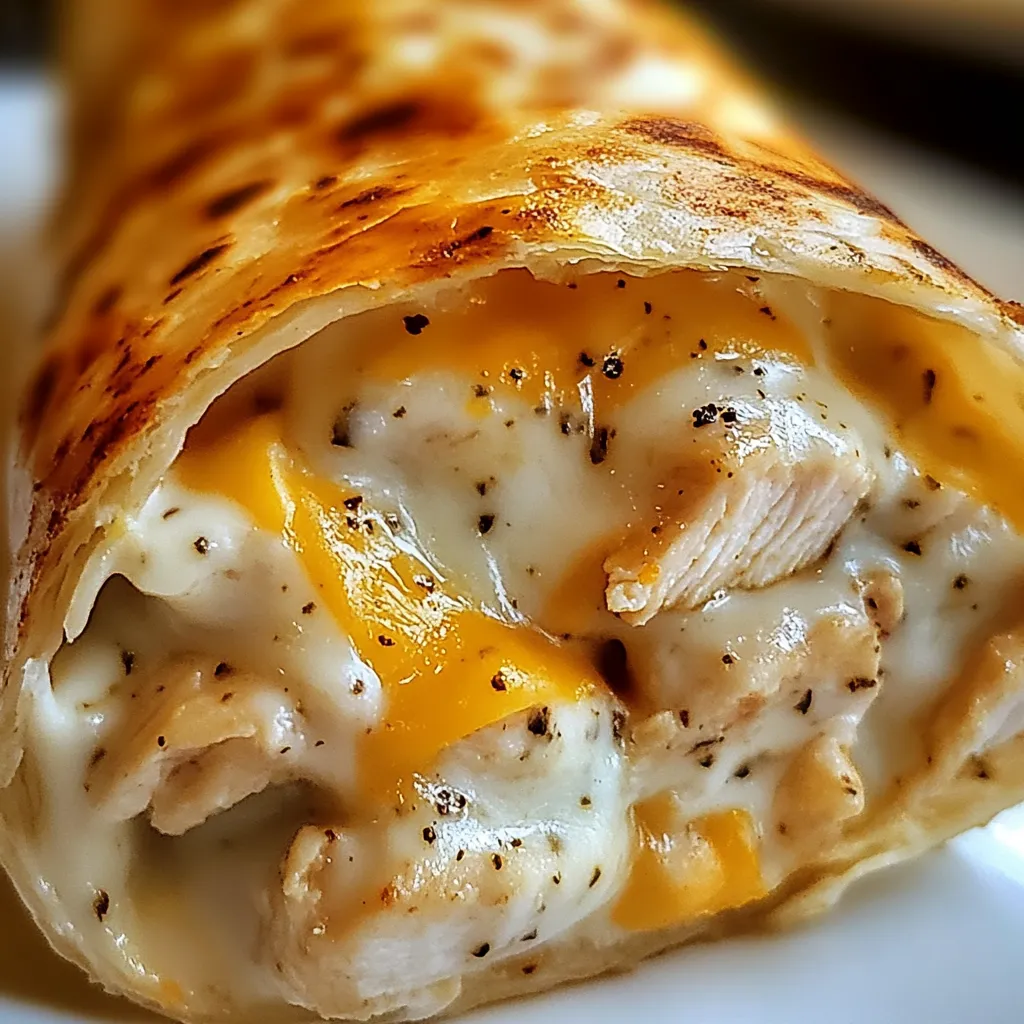
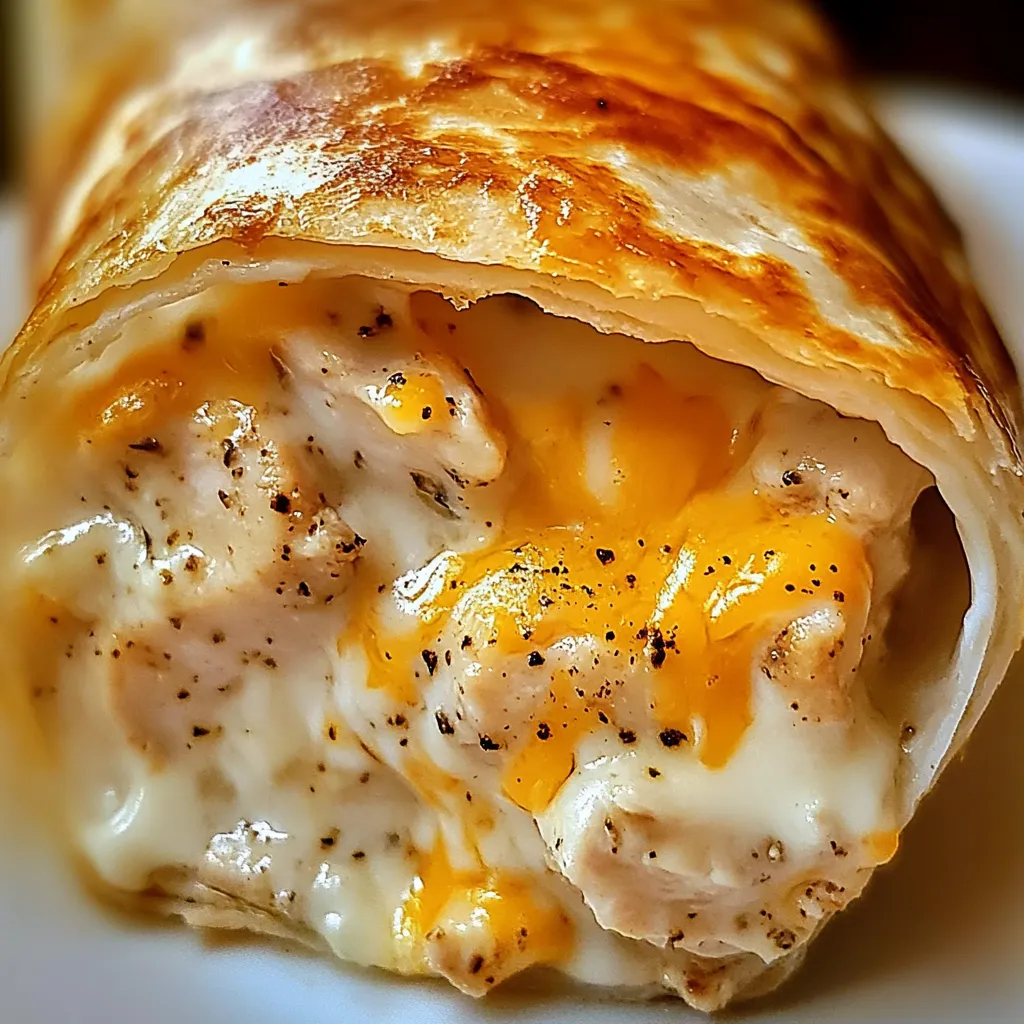
Tender chicken enveloped in a rich garlic-infused cheese mixture and wrapped in a golden tortilla creates the ultimate handheld meal experience. These Cheesy Garlic Chicken Wraps transform simple ingredients into a satisfying culinary adventure that delivers restaurant-quality flavor with minimal effort.
Last month, I served these wraps during our family game night. My nephew, who typically pushes food around his plate, devoured two wraps and asked if he could learn how to make them. The garlicky aroma filled our home, creating an atmosphere of warmth and anticipation that transformed a simple meal into a memorable experience.
Premium Ingredient Selection
- Rotisserie Chicken: Pre-cooked rotisserie chicken provides exceptional flavor depth and saves valuable cooking time. Look for a simply seasoned bird to complement the garlic and cheese flavors without competing.
- Quality Cheese Blend: Combining sharp cheddar and mozzarella creates the perfect balance of flavor and meltability. Freshly grated cheese melts more evenly than pre-packaged shredded varieties.
- Fresh Garlic Cloves: Fresh garlic provides unmatched aromatic properties and flavor complexity. Select firm bulbs with tight skin for the most potent flavor profile.
- Cream Cheese Foundation: Full-fat cream cheese creates a luscious, velvety base that binds the filling ingredients. Allow it to soften completely at room temperature for seamless incorporation.
- Artisan Tortillas: Choose large, fresh flour tortillas that remain pliable when heated. Their neutral flavor provides the perfect canvas for the rich filling.
Creating Wrap Perfection
- Aromatic Garlic Infusion:
- Begin by melting butter in a skillet over medium heat. Add freshly minced garlic, stirring constantly to prevent burning. This crucial step infuses the butter with garlic essence, creating a foundation of flavor that permeates the entire dish.
- Chicken Enhancement:
- Incorporate pre-cooked chicken into the garlic-infused butter. Season with garlic powder, Italian herbs, salt, and freshly ground pepper. Allow the chicken to absorb these flavors while gently warming through, approximately 3-4 minutes.
- Cheese Mixture Creation:
- In a separate bowl, combine room-temperature cream cheese, sour cream, and half the shredded cheese. Mix until perfectly smooth and integrated. This mixture provides the creamy, indulgent element that binds the filling together.
- Filling Integration:
- Remove the skillet from heat and fold the cheese mixture into the seasoned chicken. The residual warmth helps melt the ingredients together, creating a cohesive filling with perfect consistency.
- Wrapping Technique:
- Place tortillas on a flat surface and divide the filling evenly among them. Sprinkle remaining cheese over each portion. Fold sides inward, then roll from bottom to top, creating a secure package that holds the filling during cooking.
- Final Toasting:
- Return wraps to a clean skillet over medium heat. Cook seam-side down first to seal, then rotate until golden brown on all sides and the cheese inside has melted completely. Apply gentle pressure with a spatula to ensure even browning and secure sealing.
 Pin
Pin
My mother taught me the importance of that final toasting step in the skillet. While it might seem tempting to skip it, this technique transforms the wrap from good to extraordinary. The contrast between the crispy exterior and the creamy interior creates a textural experience that elevates this simple dish to something truly special.
Serving Suggestions
Pair with a simple green salad dressed with lemon vinaigrette for a complete meal. Serve with roasted vegetables for additional nutritional value. Create a dipping station with marinara sauce, ranch dressing, and garlic aioli for a fun, interactive meal experience.
Flavorful Variations
- Incorporate sautéed mushrooms and spinach for an earthy dimension.
- Add sun-dried tomatoes and fresh basil for Italian-inspired flavor.
- Substitute pepper jack cheese and add jalapeños for a spicy kick.
- Include crumbled bacon for a smoky, indulgent upgrade.
Storage Solutions
Refrigerate leftover wraps in an airtight container for up to three days. Reheat in a dry skillet over medium-low heat for best texture maintenance. For longer storage, wrap individually in foil, place in freezer bags, and freeze for up to one month.
These Cheesy Garlic Chicken Wraps represent the perfect intersection of convenience and comfort. The harmonious blend of familiar flavors wrapped in a portable package proves that extraordinary meals don't require complicated techniques or exotic ingredients.
 Pin
Pin
Common Recipe Questions
- → Can I use a different type of meat in these wraps?
- Absolutely! Turkey, shredded beef, or even bacon would work well. Just make sure the meat is pre-cooked before adding it to the recipe.
- → How do I store leftover wraps?
- Store assembled but uncooked wraps in the fridge for up to 2 days wrapped in foil or plastic wrap. Cook when ready to eat. Already-cooked wraps can be refrigerated and reheated in a skillet or oven.
- → Can I freeze these wraps?
- Yes! Wrap each assembled (but uncooked) wrap individually in foil, place in a freezer bag and freeze for up to 3 months. Thaw in the fridge overnight before cooking.
- → What can I serve with these wraps?
- A simple green salad, potato chips, french fries, or a light soup make great sides. For dipping, try marinara sauce, ranch dressing, or salsa.
- → How can I make these wraps healthier?
- Use whole wheat tortillas, low-fat cheese and dairy products, and add extra vegetables like spinach, diced bell peppers, or shredded carrots to the filling.