
 Pin
Pin
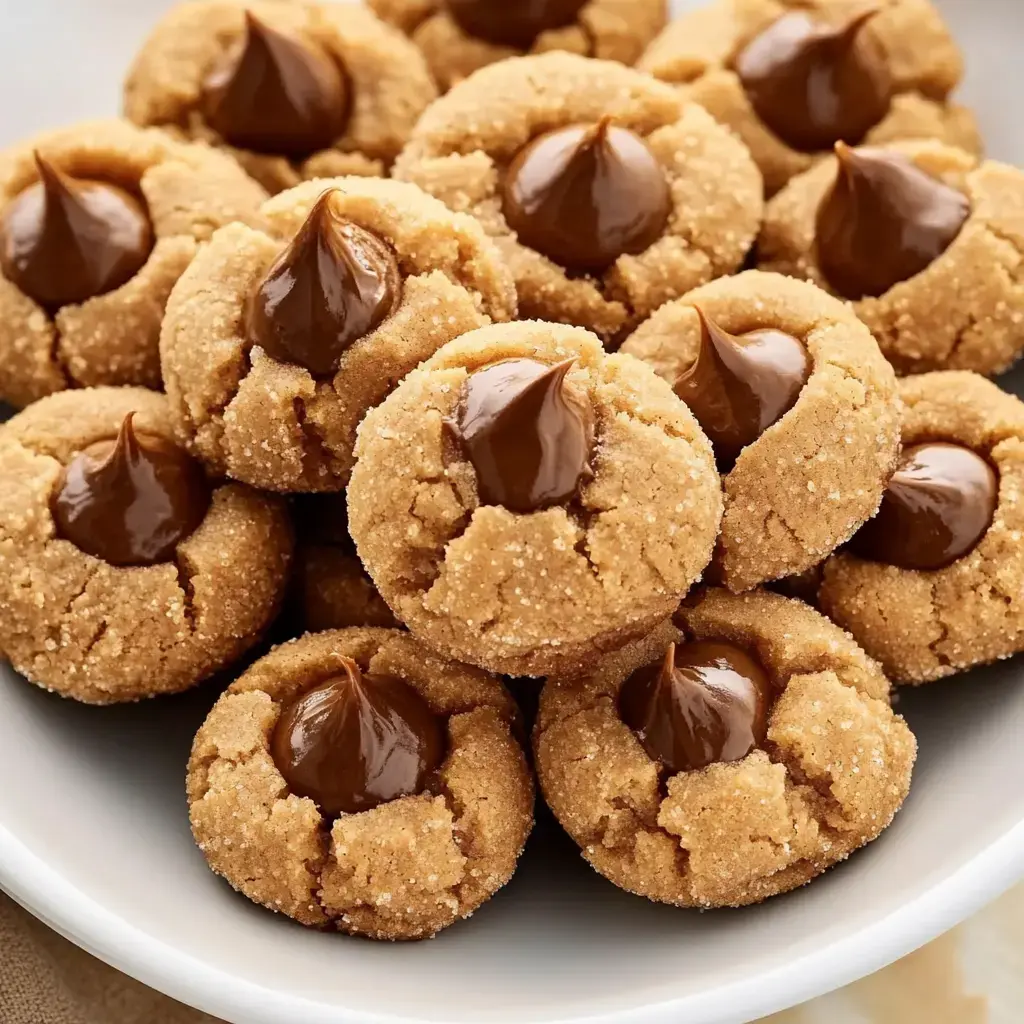
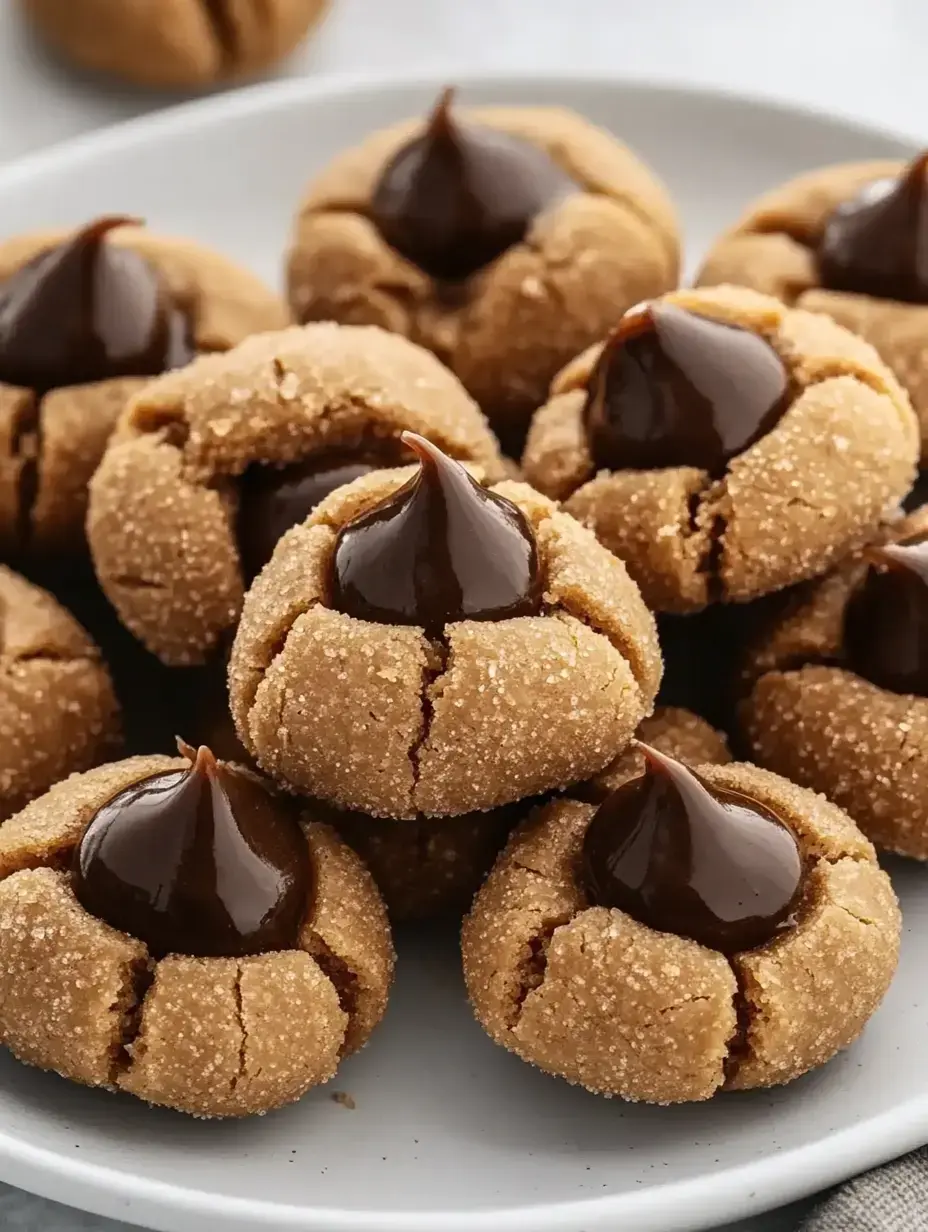
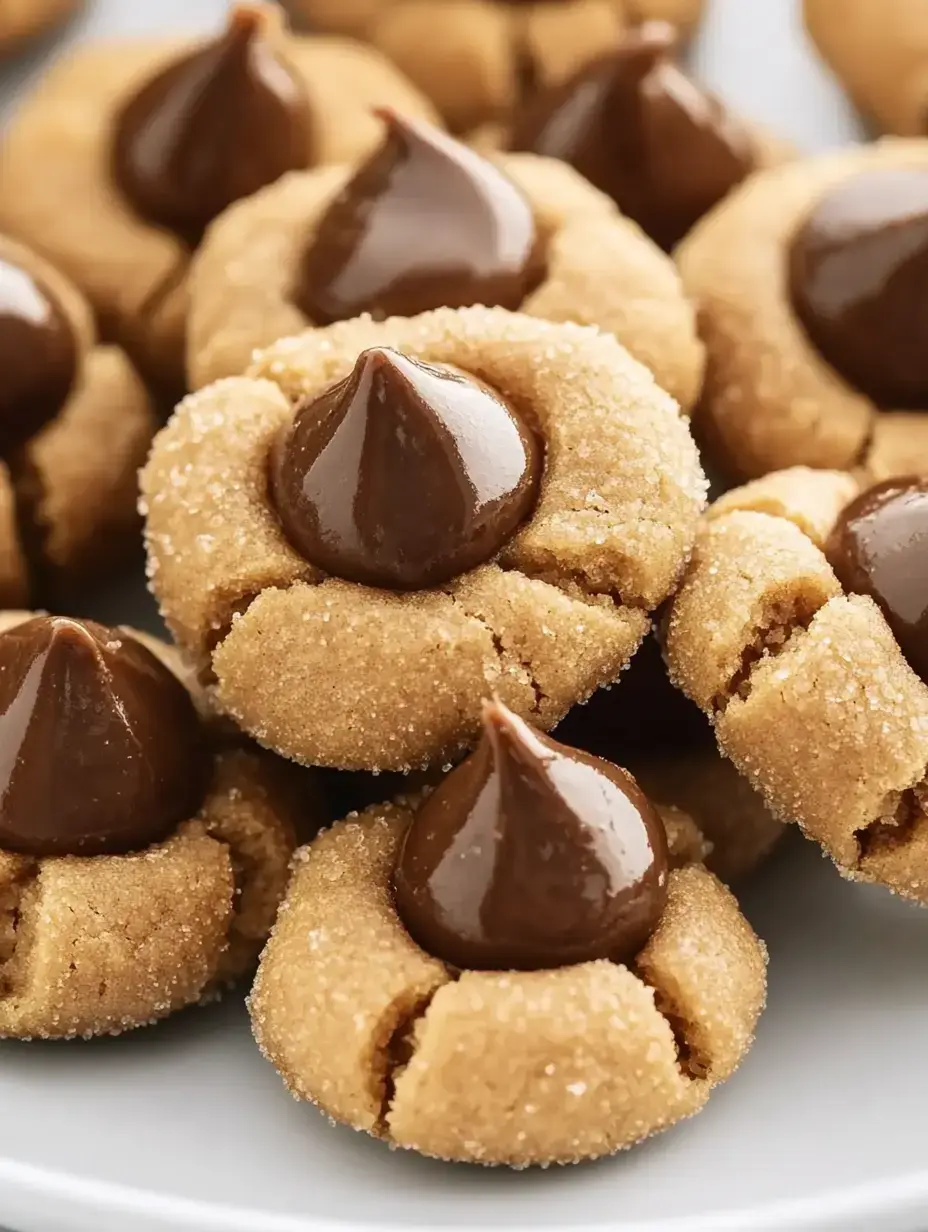
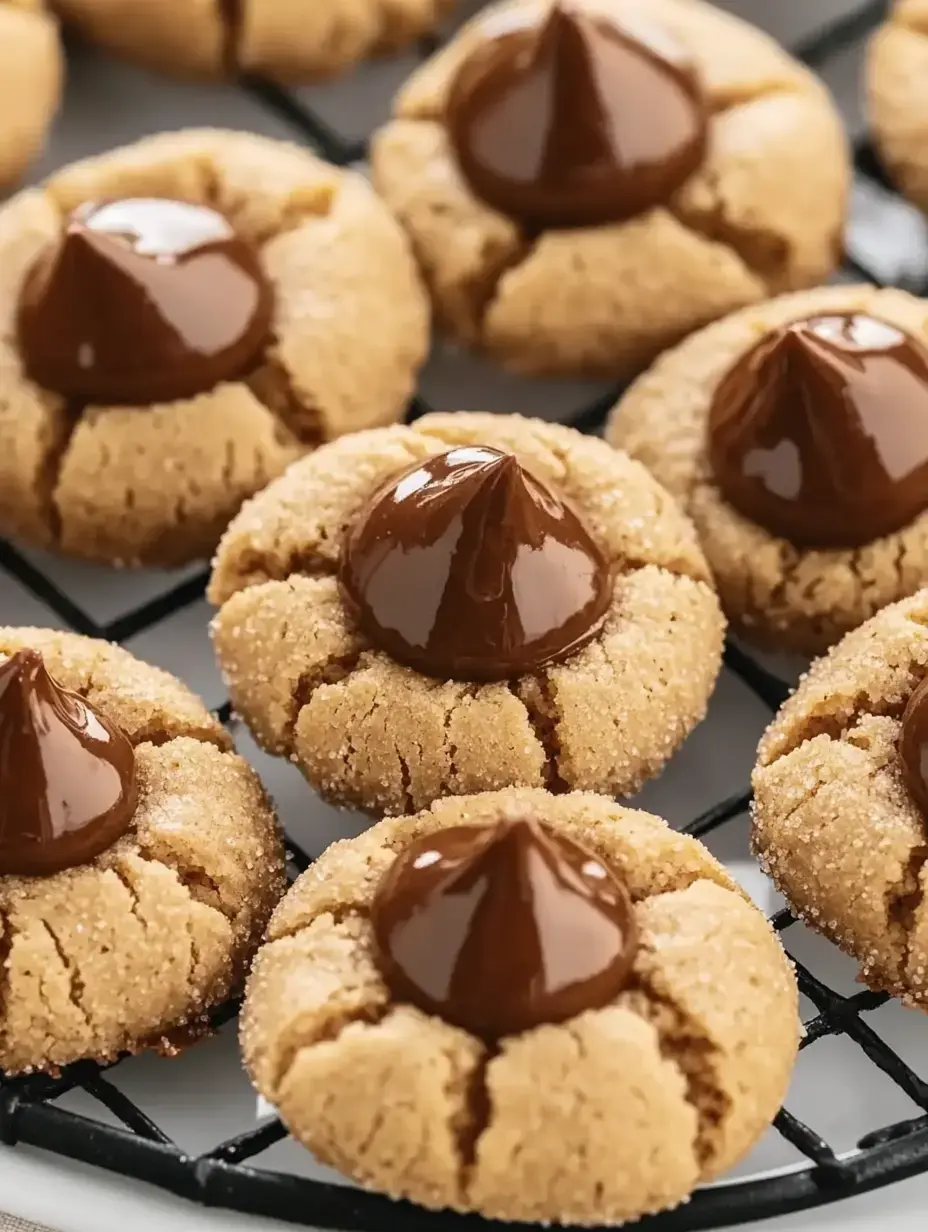
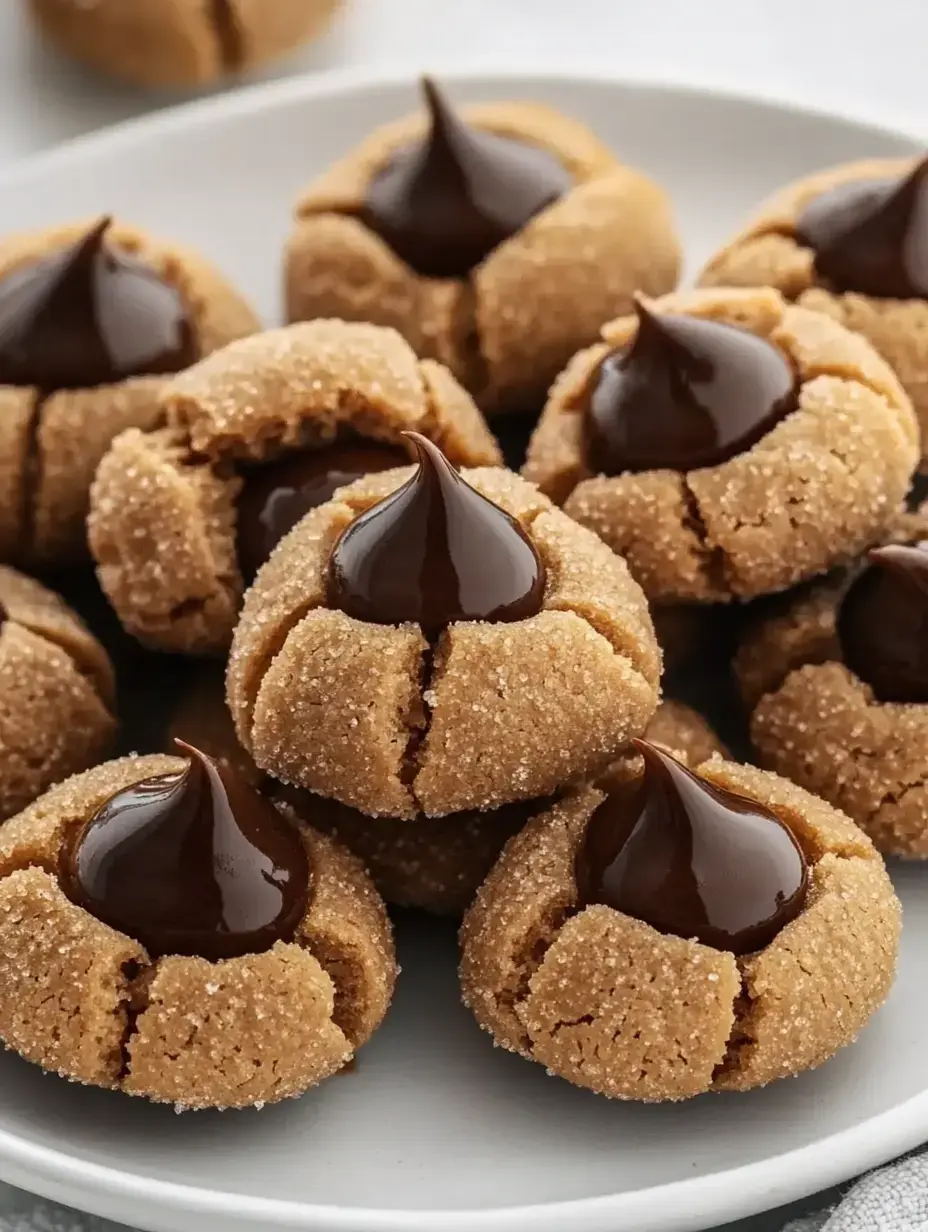
The moment I start whipping up these peanut butter blossoms, my home fills with the warmest memories. These treats, with their chewy peanut butter base topped with a chocolate kiss, always bring out smiles. I've been making these gems since my early days cooking in grandma's kitchen, and they still warm my heart each time. There's something almost magical in every bite.
These Cookies Couldn't Be More Straightforward
WHAT YOU'LL NEED: I always have these basics on hand: all-purpose flour, baking soda, salt, smooth peanut butter (we love using JIF), unsalted butter, white sugar, light brown sugar, a large egg, vanilla extract, and those classic Hershey's Kisses.
HOW IT WORKS: We'll start by combining the dry stuff, then beat the peanut butter-butter combo with sugars, throw in an egg and vanilla, and mix it all together. After chilling, we'll coat our dough balls with sugar, bake them until they're just right, and finish each with a chocolate kiss.
TIMING AND AMOUNT: The whole process runs about 2 hours and 25 minutes (mostly just waiting while the dough chills), and you'll end up with 28 beautiful cookies.
What Makes These Cookies So Special
I've played with this recipe for years and found some real game-changers. First off, don't skip chilling the dough—it's what keeps your cookies from turning into flat discs. My best tip? Store those Hershey's Kisses in the freezer—they're way easier to handle when cold. My friends at cookie swaps always wonder how mine look so perfect. And the taste? They've got just the right balance of peanutty goodness and sweetness—they'll quickly become your favorite too.
What You'll Need For Baking
Here's everything needed for these family favorites:
The peanut butter adds that delicious nutty taste we can't get enough of. Rolling them in sugar gives a beautiful shimmer. And those chocolate kisses make the perfect finishing touch.
Here's what to grab at the store:
- 1 ½ cups all-purpose flour
- ¾ teaspoon baking soda
- ½ teaspoon salt
- ¾ cup creamy peanut butter
- ½ cup unsalted butter, softened completely
- ⅓ + ½ cup granulated sugar (⅓ for dough, ½ for rolling)
- ⅓ cup light brown sugar, packed
- 1 large egg, room temperature
- 2 teaspoons vanilla extract
- 28 Hershey's Kisses (stick them in the freezer right now!)
 Pin
Pin
Smart Ingredient Swaps
Through countless batches, I've tried some tasty twists that my family absolutely loves:
- Try using half crunchy peanut butter for some added bite—my little ones can't get enough!
- Swap regular sugar for turbinado when rolling—it looks stunning and gives an amazing crunch.
- My husband's top pick? Switching to dark chocolate kisses instead of milk chocolate.
- Want something different? Try a tiny splash of almond extract instead of vanilla—just remember it's stronger, so use half the amount.
- My kids love picking colored sugars for rolling during holidays—the Christmas red and green always looks festive!
Let's Get Started
Get ready for your kitchen to smell amazing! After making these countless times, I'll share all my best secrets.
IMPORTANT NOTE: Don't rush the butter softening in the microwave—let it sit out naturally. Same goes for your egg—room temp really does matter!
STEP ONE: First, mix your flour, baking soda, and salt in a bowl. Just set it aside for now.
STEP TWO: Here comes the fun part! Blend your peanut butter, softened butter, and both sugars until everything looks smooth and creamy. My hand mixer at medium speed makes this super easy.
Mixing Up The Good Stuff
STEP THREE: Now add your egg and vanilla. Keep mixing until you've got a silky, smooth mixture. I never get tired of watching it all come together!
STEP FOUR: Slowly add in your dry ingredients. I always run my spatula around the bowl to catch everything. You'll know it's ready when the dough feels soft but doesn't stick to your fingers.
The Most Important Waiting Game
STEP FIVE: Now comes the part that really matters! Cover your dough and stick it in the fridge for at least an hour. I've sometimes left mine overnight when things get busy, and they still turn out great. Don't skip this chilling step—it's what makes these cookies stand out from the rest.
 Pin
Pin
Prep Your Baking Area
STEP SIX: While waiting, line your cookie sheets with parchment paper—it works like magic for easy removal! Put some sugar in a small bowl for coating. This is when I start getting excited—we're getting closer to the best part!
Form Your Cookie Balls
STEP SEVEN: This part's my favorite! Grab your dough (I use a 1½ tablespoon scoop—it's perfect), roll into balls, then coat each one in sugar. Place them on your lined sheets. Each little ball promises something delicious coming soon!
FRIENDLY TIP: Watch your oven closely. Every oven has its quirks, and these cookies deserve just the right baking time.
Final Prep Before Baking
STEP EIGHT: Set your oven to 350°F. While it heats up, put your cookie sheets with the sugar-coated dough balls back in the fridge. This extra chill time is my little secret for cookies that keep their shape. I found this out the hard way after some too-flat cookies!
Time To Bake
STEP NINE: Arrange 9-12 cookies per sheet—they need space to grow! Bake for 10-12 minutes. You'll know they're done when the edges turn slightly golden and the sugar coating starts to crack.
FRIENDLY TIP: Keep those kisses in the freezer until you need them. Cold chocolate keeps its shape better when pressed into warm cookies!
 Pin
Pin
Adding The Perfect Topping
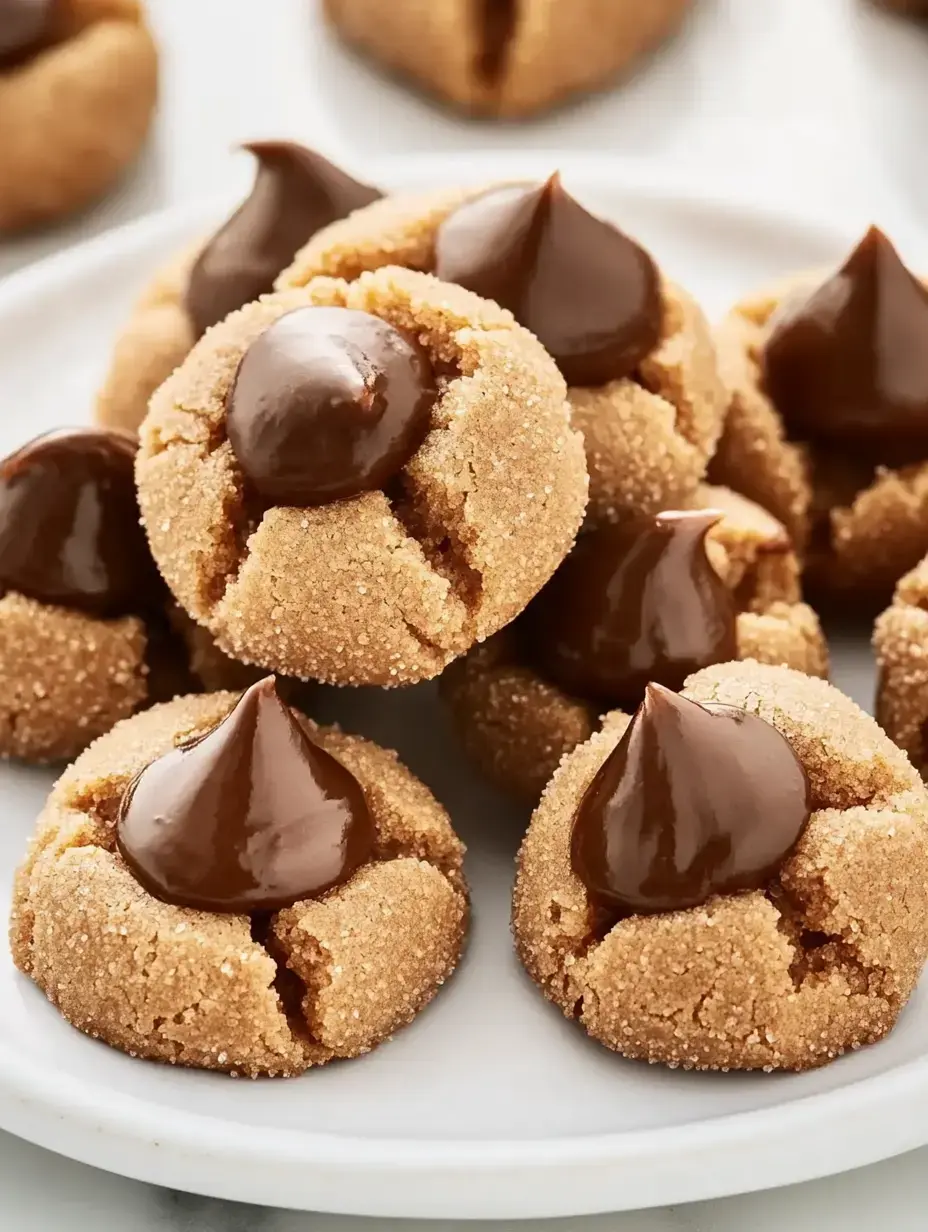
STEP TEN: Here's where timing counts! Pull the cookies out and right away press a cold Hershey's Kiss into the middle of each one. I love watching them sink slightly into the warm cookie.
STEP ELEVEN: Let them sit on the baking sheet for five minutes—don't skip this! Then move them to a cooling rack. The hardest part now is waiting for them to cool completely!
Ways To Enjoy Your Cookies
These treats work for so many occasions! They're perfect with afternoon coffee or tea. At cookie exchanges, they're always the first to disappear. Sometimes I'll serve them alongside vanilla ice cream for something extra special. And don't forget to try my other cookie recipes—they're just as foolproof!
When To Serve These Sweet Treats
I've made these cookies for practically every occasion. They're always stars at holiday cookie exchanges—everyone knows them right away!
They make Christmas Eve feel extra cozy next to mugs of hot chocolate.
Wrap them in pretty containers for heartfelt holiday presents.
My kids beam when they find these in their lunchboxes.
They work on any dessert table, holiday or not.
And sometimes, I just make them because—well, who needs a reason for good cookies?
Storage Tips And Tricks
Want to plan ahead? Here's what works best:
PREP EARLY: The dough can stay in the fridge overnight—just cover it well.
KEEPING FRESH: They'll stay good in an airtight container for five days—though at my house they vanish much faster!
FREEZING OPTION: They freeze really well for up to two months. Just let them thaw on the counter when you're ready to enjoy them again.
 Pin
Pin
Fixing Common Problems
After tons of batches, here's how I fix the usual issues:
- Cookies spreading too much? Your dough got warm. Stick it back in the fridge!
- Chocolate kisses melting away? Make sure they're super cold, and don't push too hard.
- Got dry cookies? Probably too much flour. I always spoon flour into my measuring cup, then level it off.
- Sugar not sticking well? Try rolling right after you form each ball.
What Makes This Version Standout
These aren't just ordinary cookies—they're little happiness bombs! Peanut butter and chocolate just work so perfectly together. My testing buddies and I spent ages getting the texture just right—soft and chewy but sturdy enough to support that chocolate kiss. Even if you're new to baking, you can nail these—I guarantee it!
Common Questions Solved
Here's what folks ask me most:
- Don't use natural peanut butter here—the regular creamy kind works way better.
- Yes, you can freeze the shaped dough balls! Just roll in sugar before you bake them.
- Always keep those kisses cold—this isn't optional if you want pretty cookies.
- Feel like experimenting? Try different chocolate types—just keep them about the same size.
Baking Memories
Making these peanut butter blossoms always reminds me of those special days baking with my grandmother. They're more than just dessert—they carry memories of floury countertops and kitchen giggles. I hope they become part of your family traditions too. Enjoy your baking adventure!
 Pin
Pin
Common Recipe Questions
- → What’s the benefit of freezing the chocolate kisses?
Keeping kisses cold means they won’t lose their shape when placed on warm cookies. They’ll stick firmly without melting away.
- → Can I prep the dough early?
Totally! You can store the dough in the fridge for two days. Just wrap it tight to keep it moist.
- → Why are my cookies spreading out too much?
Chill the cookie dough before baking and keep unused portions cool. Using warm dough or a hot tray can make them spread more than you want.
- → Will crunchy peanut butter work?
Smooth peanut butter is best for these cookies. Crunchy varieties may lead to uneven spreading and an inconsistent texture.
- → What’s the best way to keep these fresh?
Store them at room temperature in a container with a tight lid for up to five days. Place wax paper between layers to avoid chocolate smudges.