
 Pin
Pin
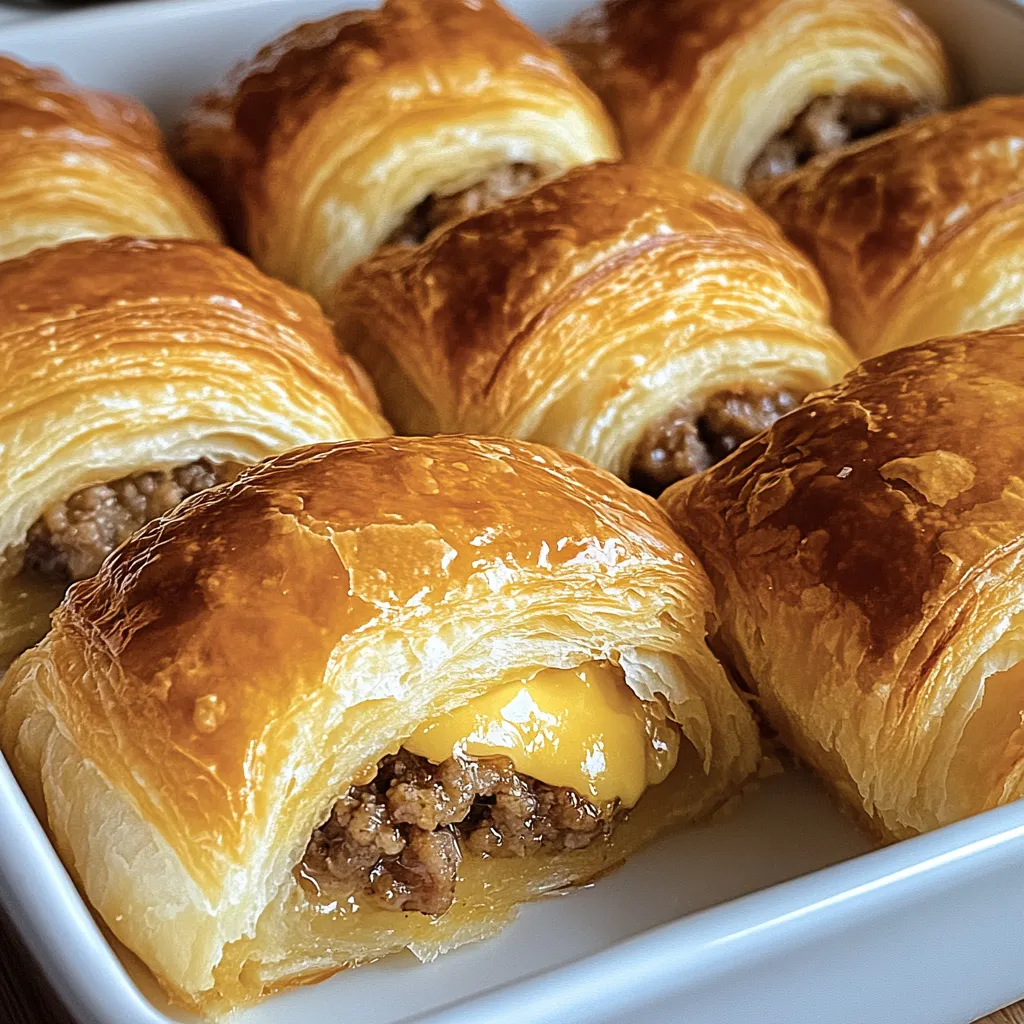
Buttery crescent dough folded around juicy breakfast sausage and melty cheese - these morning rolls have turned into the breakfast item my family asks for most. Something magical happens when cheese seeps into the spiced sausage, making every bite full of tasty surprises. I've tweaked this recipe for years during our family weekend brunches, and now I've nailed down every tiny step so they come out amazing every time.
I've baked these rolls so many times, and they're always gone within minutes. At our family get-together last weekend, even my super picky nephew asked for multiple helpings!
Key Ingredients and Shopping Advice
- Crescent Roll Dough: Go for the butter-rich kinds for extra flaky layers. Pillsbury Original works best for me - they always cook up with a nice golden color.
- Breakfast Sausage: Pick sausage that has noticeable herbs and spices. The sage-flavored Jimmy Dean really adds something special to the taste.
- Cheddar Cheese: Grab a block and shred it yourself - it melts way better than the pre-packaged stuff. The orange kind gives your rolls that beautiful golden look when it melts.
Complete Cooking Instructions
- First, get your oven hot at 375°F.
- Cover your baking tray with parchment - this stops cheese from sticking and makes cleaning up super easy.
- Cook the sausage until it breaks into tiny chunks in your pan.
- Keep moving it around until you don't see any pink and the edges start turning brown. This usually takes around 8-10 minutes. Pat it dry with paper towels so your rolls won't get soggy.
- Roll out your crescent dough on a clean counter with a bit of flour.
- Pull apart the triangles carefully so they don't tear. If it's sticking to your fingers, just add a little more flour to your hands.
- Add your fillings in the right spots - put about 2 tablespoons of sausage near the wider end, then 1-2 tablespoons of cheese on top.
- Don't go all the way to the edges or it'll leak out.
- From the wide part, roll each triangle while keeping the filling tucked inside.
- You want to roll tight enough to keep everything in but not so tight that the dough rips.
- Arrange your rolls on the baking sheet with room between them - they'll grow bigger while baking.
- I usually keep them about 2 inches from each other.
- Keep an eye on them while they bake.
- You want them to turn a nice golden brown, which takes about 12-15 minutes. Check that the bottoms are slightly darker than the tops.
- Let them cool for 3-5 minutes after they come out of the oven.
- The inside gets super hot and needs time to cool down a bit.
 Pin
Pin
From my own cooking adventures, the breakfast sausage really makes this dish shine. My family goes crazy when I use the sage-flavored kind - it adds this amazing smell that makes these rolls extra tasty. That aroma of sage and butter filling our house on weekend mornings has become our family's breakfast time signal.
Mastering The Filling Amounts
Finding the right balance of fillings took me lots of practice. Too much stuffing makes them burst open, while too little makes them boring. I've found that 2 tablespoons of sausage with 1½ tablespoons of cheese works best. The cheese melts right into the sausage, creating these little flavor spots that make each bite exciting.
Prep Ahead Tricks
A game-changer I stumbled on was how great these work for meal prep. I often make a bunch on Sunday night, keeping some in the fridge for early week breakfasts and freezing the rest. They keep their texture surprisingly well, and having them ready to go has saved so many chaotic mornings at our house.
Ways To Serve
After years making these rolls, I've come up with some favorite serving ideas. For family breakfasts, we eat them with fresh fruit and yogurt. When friends come over for brunch, I put them on a big plate with different dips - honey mustard and maple-butter are always hits. I'm always amazed at how versatile these little rolls can be.
Fun Twists To Try
Through countless batches and family requests, I've played around with many different versions. Adding scrambled eggs turns them into a complete breakfast in one bite. Chopped bell peppers give them color and crunch. My personal favorite twist is spreading a thin layer of cream cheese before the sausage - it makes the center incredibly rich and smooth.
My Best Cooking Tricks
- Rolling Technique: Roll from the wide end with steady pressure, gently pulling the dough as you go. This keeps everything tight and cooks evenly.
- Cheese Choice: Shred cheese yourself instead of buying the pre-shredded bags. It melts better and spreads the flavor more evenly.
- Watch The Heat: Let your sausage cool down a bit before putting it on the dough. This keeps the dough from getting wet and helps it rise properly.
 Pin
Pin
After making these breakfast rolls for years, they've become more than just food - they're now part of our family's morning routine. The easy prep combined with how good they taste makes this recipe really special. Whether you're feeding hungry kids or having friends over for brunch, these rolls always hit the spot. They show that sometimes the easiest recipes become the ones we treasure most.
Common Recipe Questions
- → Can these be prepped the night before?
- Sure! You can prepare the sausage mixture ahead and keep it in the fridge. Assemble the rolls fresh in the morning. Freezing baked rolls for up to 2 months works too.
- → What's the best way to warm leftovers?
- Pop them in the oven at 350°F for 5-7 minutes until hot. Unlike microwaving, this keeps the outside crispy.
- → Can I switch up the cheese?
- For sure! Use mozzarella, Swiss, or even pepper jack. Mixing cheeses also adds an extra punch of flavor.
- → What pairs well with these rolls?
- Pair with hash browns, scrambled eggs, or fresh fruit. Offer dipping sauces like ketchup, hot sauce, or some hearty country gravy.
- → Can I add veggies to the filling?
- Totally! Bell peppers, onions, or spinach work great. Be sure to cook and drain them first to avoid soggy rolls.